
The Complete Guide to Using Your Professional Headshot Across Multiple Platforms
Learn exact dimensions, file sizes, and crop preferences for using your professional headshot on LinkedIn, email, Zoom, and 15+ platforms effectively.
You just got back your professional headshots and they look great. Now what?
Most people upload their new photo to LinkedIn, maybe update Facebook, and then… that’s it. Which is honestly such a waste because you probably have a dozen places where that headshot could be used (building trust, looking professional, staying consistent across platforms).
The tricky part? Every platform wants something different. LinkedIn crops your photo into a circle. Your email signature needs a tiny file that won’t slow down emails. Your company website might want a vertical crop while Twitter (sorry, X) prefers square.
This guide breaks down exactly what dimensions, file formats, and crops you need for each major platform. Think of it as maximizing your headshot ROI—getting the most value from the investment you already made.
LinkedIn: Your Most Important Platform (Probably)
Let’s start with the big one. If you’re only going to update one platform after getting new headshots, make it LinkedIn.
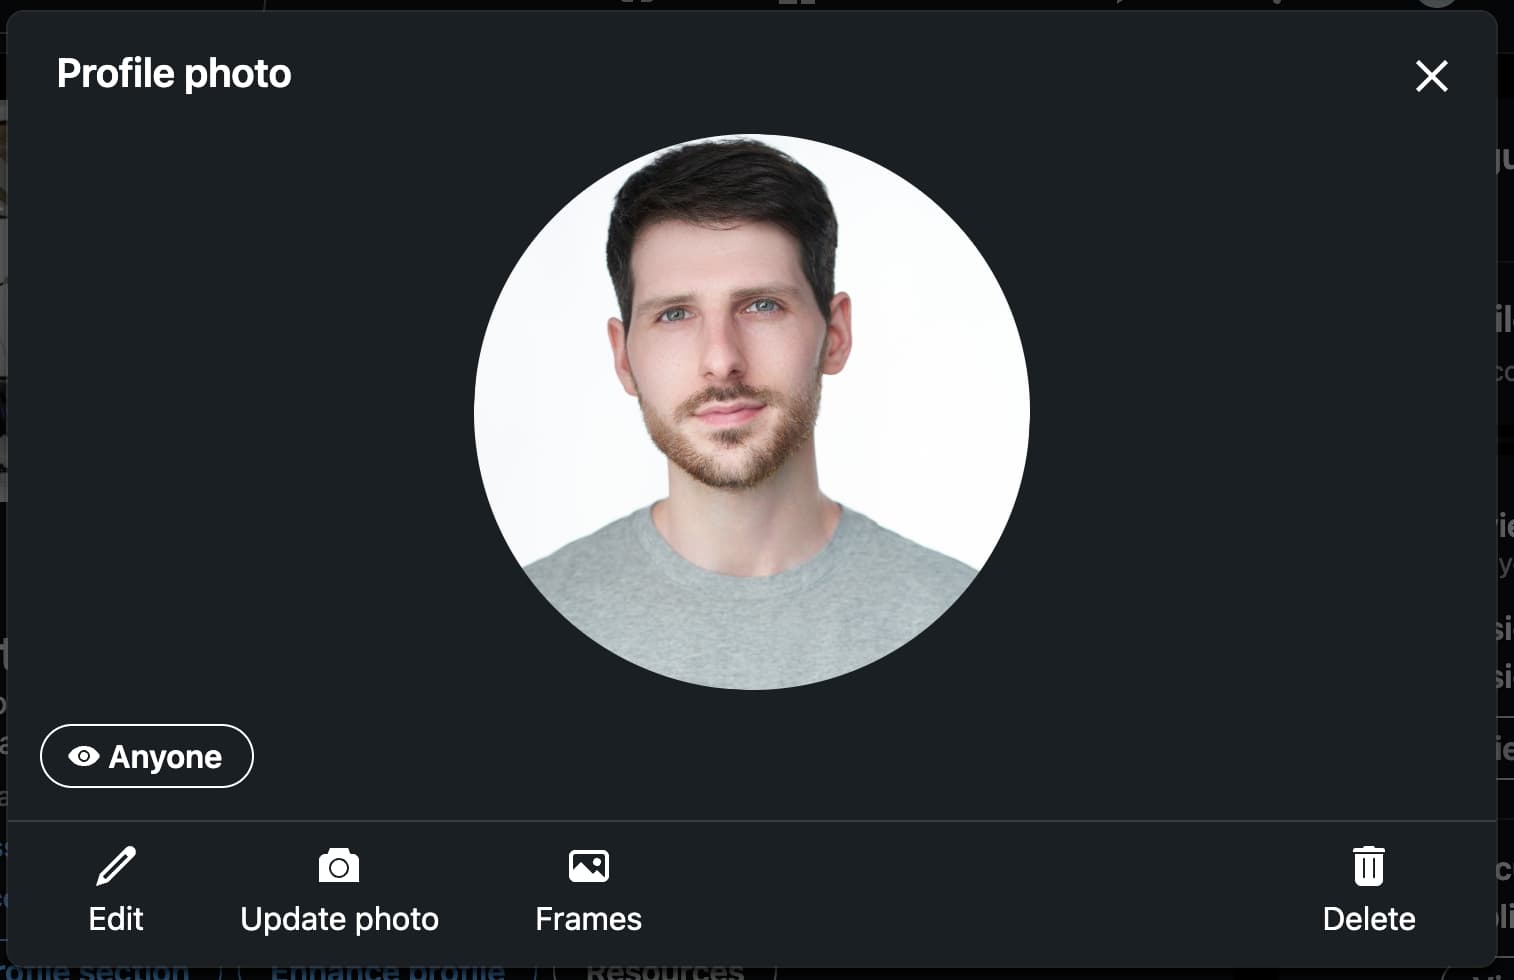
Technical specs:
- Recommended dimensions: 400 x 400 pixels (minimum)
- Ideal upload size: At least 7680 x 4320 pixels (yes, really—LinkedIn will crop it down)
- Aspect ratio: Square (1:1)
- File format: JPG or PNG
- File size limit: 8 MB
- Display: Circular crop
Crop preferences: Your photo gets displayed in a circle, which means the corners get cut off. You want a fairly tight crop with your head and shoulders centered. Leave a little breathing room around your head (not too tight to the edges) because LinkedIn’s circular crop can be unforgiving.
Background should show slightly—don’t crop so tight that it’s just your face floating in space. Think head and upper shoulders, with maybe 10-15% space above your head.
Common mistakes: Using a horizontal photo that gets weirdly cropped when forced into a square. Uploading a full-body shot that makes your face tiny in the circular thumbnail. Not checking what it looks like after LinkedIn applies the circular crop (always preview it). I have also found that sometimes the preview feature on LinkedIn when uploading isn’t true to how it would really look on your profile. Sometimes there are small changes. So once you “accept” the cropping, make sure to check your live profile right away to possibly make changes.
Email Signature: The Sneaky Important One
Often overlooked, but your email signature photo might get seen more than any other headshot you use. Think about how many emails you send per week.
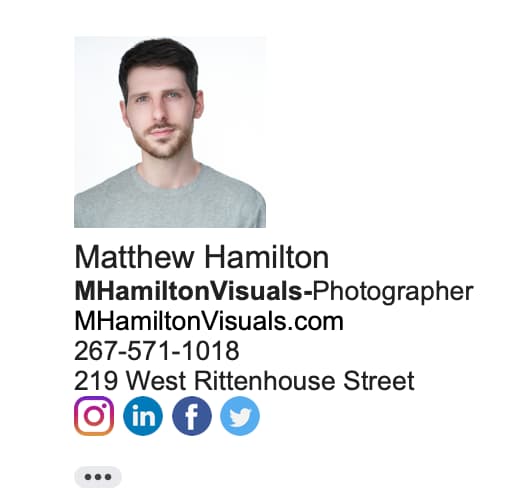
Technical specs:
- Recommended dimensions: 200 x 200 pixels (or 300 x 300 max)
- Aspect ratio: Square (typically)
- File format: JPG (PNG works but creates larger files)
- File size: Under 50 KB (this is critical)
- Display: Usually small square or circle
Crop preferences: Tight crop, just head and shoulders. This displays small, so you want your face recognizable even at thumbnail size. Square aspect ratio works best because most email clients display signatures in limited vertical space.
The file size thing: This is where people sometimes mess up. Email clients (and recipients) hate massive embedded images in signatures. A 2 MB photo slows down every single email you send and can trigger spam filters. This can also actually over time fill up your allotted included storage in your email account.
Export a small, compressed version specifically for email. Your photographer can provide this, or you can use free tools like TinyPNG or even Preview on Mac to compress it. Aim for under 50 KB—it’ll still look sharp at signature size. You can use the same square crop you end up using for LinkedIn as well.
Professional Website / Team Pages
Technical specs:
- Recommended dimensions: Varies widely (1000 x 1500 pixels is a safe starting point)
- Aspect ratio: Could be horizontal but often square (1x1)
- File format: JPG or PNG
- File size: Under 500 KB (for page load speed)
- Display: Depends on site design
Crop preferences: This depends entirely on your website layout. Team pages sometimes use squares, sometimes vertical rectangles. Check what your current site uses (or ask your web designer) before cropping. You can also probably just give them a wide crop to use and they can crop and compress however needed.
Vertical crops typically show head and upper torso, giving more context than a tight headshot. Square crops are similar to LinkedIn—head and shoulders, centered.
What to ask your photographer: Request both square and vertical crops if you’re not sure what your site needs. Much easier than doing it yourself later and losing important parts of the image.
Facebook (Personal Profile)
Technical specs:
- Recommended dimensions: 180 x 180 pixels (minimum)
- Ideal upload: 960 x 960 pixels or larger
- Aspect ratio: Square (1:1)
- File format: JPG or PNG
- Display: Circular crop (like LinkedIn)
Crop preferences: Similar to LinkedIn—square image, centered on your face, with the understanding it’ll display in a circle. Leave breathing room around your head. Also keep in mind that it just appears as a circle when viewing from the profile page itself. If someone clicks on it, it will show the full crop. So really it needs to look good with both setups.
The cover photo (1640 x 856 pixels, 16:9 ratio) is a different story—that’s where you might use a wider environmental shot if your photographer captured those.
Twitter / X
Technical specs:
- Recommended dimensions: 400 x 400 pixels
- Aspect ratio: Square (1:1)
- File format: JPG, PNG, or GIF
- File size limit: 2 MB
- Display: Circular crop
Crop preferences: Same deal as LinkedIn and Facebook—square image that displays as a circle. The same file you use for LinkedIn typically works perfectly here.
Technical specs:
- Recommended dimensions: 320 x 320 pixels (minimum)
- Ideal upload: 1080 x 1080 pixels
- Aspect ratio: Square (1:1)
- File format: JPG or PNG
- Display: Circular crop
Crop preferences: Again, square with circular display. You’re probably noticing a pattern here—most social platforms have standardized on this format. LinkedIn made a big impact when they first introduced this.
Instagram posts themselves are different (square 1:1, vertical 4:5, or horizontal 1.91:1), so if you’re posting your headshot as content rather than just using it as a profile picture, you have more flexibility.
Zoom / Microsoft Teams / Google Meet
Technical specs:
- Recommended dimensions:
- Zoom: 1920 x 1080 pixels (16:9) or square
- Teams: 648 x 648 pixels (square)
- Google Meet: Any aspect ratio (typically square)
- File format: JPG or PNG
- File size: Usually under 2-4 MB
Crop preferences: Since 2020 and the pandemic people really started to pay more attention to this. As you know when you aren’t on camera, these platforms display your photo instead. Square crops work universally, but Zoom actually supports rectangular photos if you want to show more of a professional environment shot. This will also make sure Zoom doesn’t put black border bars on either side of your photo.
Most people use the same square headshot they have on LinkedIn, which is honestly fine but I think the horizontal rectangular crop looks better. Just make sure it’s high enough resolution that it doesn’t look pixelated on larger screens during meetings.
Business Cards (Print Specs)
Technical specs:
- Recommended resolution: 300 DPI minimum (for print)
- Typical printed size: 1 x 1 inch to 1.5 x 1.5 inches
- That translates to: 300 x 300 pixels minimum (600 x 600 safer)
- File format: High-res JPG or TIFF
- Color space: CMYK (for professional printing). Your photographer should be able to make this happen.
Crop preferences: Usually square or slightly vertical. Tight crop because the printed size is small. Your face needs to be clearly recognizable at business card scale.
Important note: The amount of people using their photos on their business cards is at an all-time low I think. But for those of you who are still doing that (no harm in having it!) Make sure to ask your photographer for a high-resolution version if you’re printing anywhere. The compressed version you use online won’t look sharp when printed. Also, your print shop (or business card service) can usually help with color space conversion if you’re not sure about CMYK vs RGB.
Industry-Specific Platforms
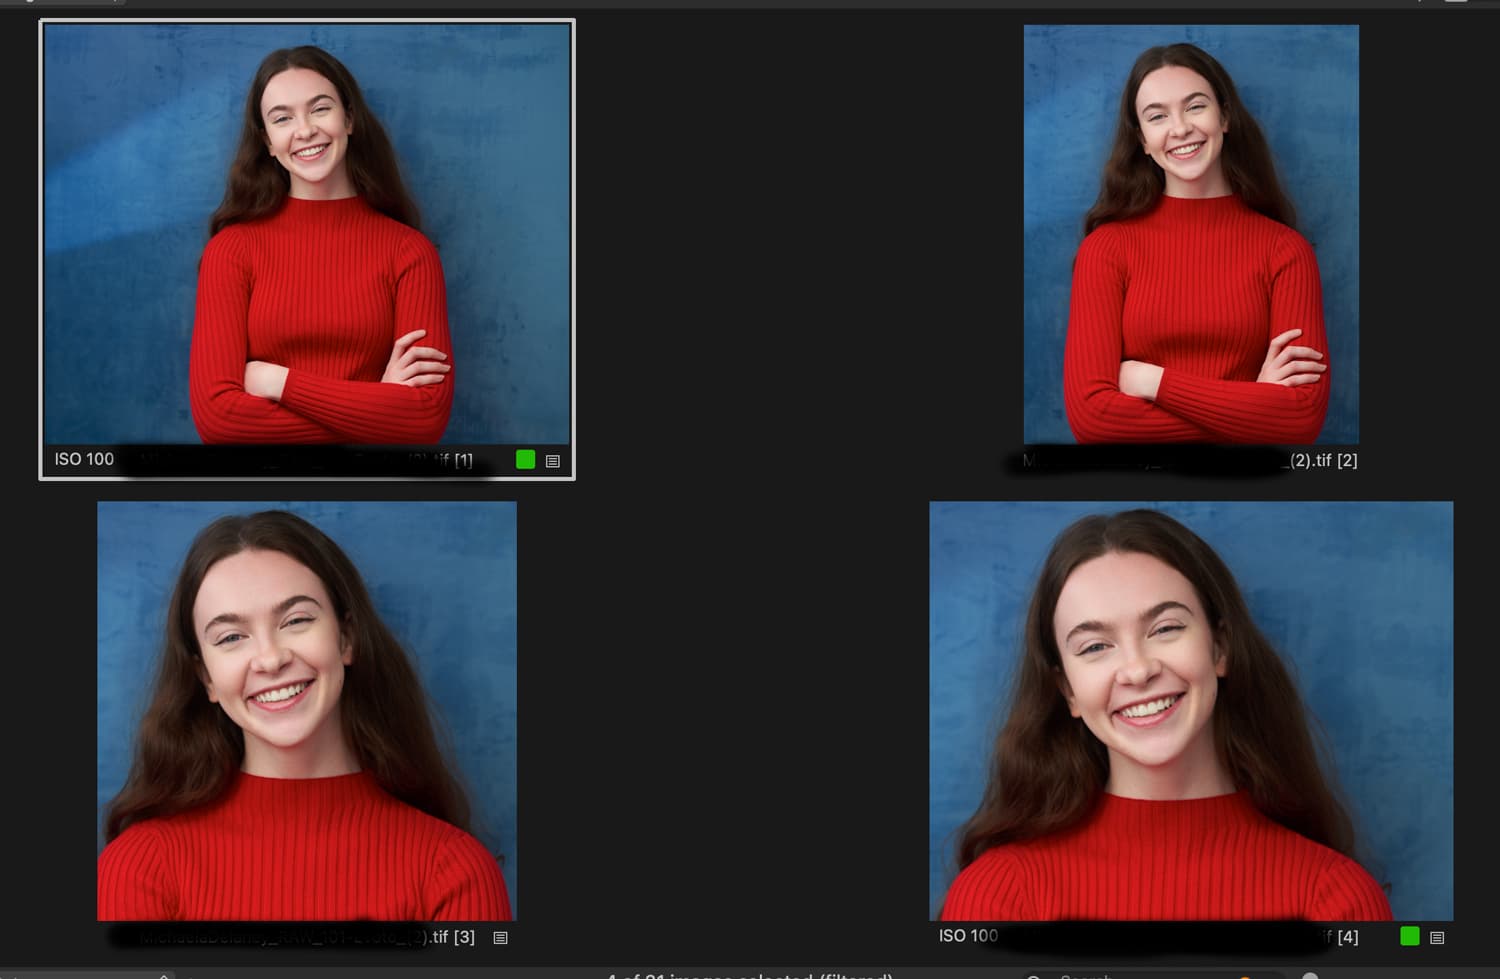
Additionally, different professions have their own platforms where headshots matter. Here’s a quick rundown of the major ones:
Zillow / Realtor.com (Real Estate):
- Dimensions: 800 x 1200 pixels recommended
- Aspect ratio: Vertical (2:3)
- Format: JPG
- Crop: Head and upper torso, professional but approachable
Avvo / Martindale-Hubbell (Lawyers):
- Dimensions: Varies (500 x 500 pixels minimum)
- Aspect ratio: Square or vertical
- Format: JPG
- Crop: Professional, typically suit and tie visible
Healthgrades / Zocdoc (Medical Professionals):
- Dimensions: 400 x 400 pixels minimum
- Aspect ratio: Square (typically)
- Format: JPG
- Crop: Professional attire visible, warm and approachable
IMDb (Entertainment Industry):
- Dimensions: 1000 x 1500 pixels minimum
- Aspect ratio: Vertical (2:3)
- Format: JPG
- Crop: Head and shoulders, neutral background
Strategy: Maintaining Consistency Across Platforms
Here’s the thing—people should recognize you across all platforms. That doesn’t mean using the exact same crop everywhere, but it does mean using professional photos across all of the platforms you use.
When to use different crops: LinkedIn, Twitter, Facebook, Instagram, email signature: All square, can be the same file Website, Zillow, IMDb: Vertical crop showing more context Zoom: Square or horizontal depending on preference Business cards: Small square, high-res version
The consistency rule: If someone finds you on LinkedIn and then checks your company website, they should see the same you. Same professional feeling, maybe different crop, but same vibe.
Basic Tools for Cropping and Resizing
So you got all of these files from your photographer. Sometimes they give you different crops to use in different settings (ask them for this!). Now what do you do with them? For specific sites you may need to crop or resize them yourself. Most people don’t realize that you don’t need Photoshop to resize your headshots for different platforms. Here are some accessible options:
Free online tools:
- Canva (has pre-set dimensions for social platforms and very user friendly)
- Photopea (browser-based, Photoshop-like interface)
- iloveimg.com (simple resize and crop)
Built-in options:
- Mac Preview (can resize and crop; even professional photographers use this a lot)
- Windows Photos app (basic editing)
- Even your phone’s photo editor (works in a pinch)
Quality Considerations: Don’t Over-Compress
This is where people mess up without realizing it. You want small file sizes for web use (faster loading, email-friendly), but you don’t want to compress so much that your photo looks fuzzy or has weird artifacts.
General rule: For web use, JPG quality setting of 80-90% is the sweet spot. Below 80% and you start seeing noticeable quality loss. Above 90% and you’re not saving much file size.
Platform-specific:
- Email signature: Compress heavily (under 50 KB) because size matters more than perfect quality at thumbnail size
- LinkedIn, social media: Moderate compression (under 200 KB, quality 80-85%)
- Website: Light compression (under 500 KB, quality 85-90%)
- Print: No compression, highest quality possible
Your Platform-by-Platform Checklist
When you get new headshots, work through this list:
- LinkedIn profile picture (400 x 400, square, under 200 KB)
- Email signature (200 x 200, square, under 50 KB)
- Company website / team page (check current specs with web team)
- Facebook profile picture (960 x 960, square)
- Twitter / X profile picture (400 x 400, square)
- Instagram profile picture (1080 x 1080, square)
- Zoom profile picture (square or 16:9)
- Microsoft Teams / Google Meet (square)
- Business cards (if applicable, high-res print version)
- Industry-specific platforms (Zillow, Avvo, Healthgrades, etc.)
- Any other professional profiles (Medium, GitHub, portfolio sites)
What to Ask Your Photographer For
Make your life easier by getting what you need upfront:
- High-resolution files (for print and future use)
- Square crop optimized for social media (LinkedIn, etc.)
- Vertical crop for website or industry platforms (if applicable)
- Small, compressed version for email signature (under 50 KB)
- Different file format options if needed (JPG and PNG)
Most photographers are happy to provide these variations.
The Bottom Line
Your professional headshot is an investment in yourself. You’ve already paid for it and spent time on the session. Using it effectively across all your platforms is how you maximize that investment.
The specs and dimensions matter because each platform has different technical requirements. A photo that looks perfect on LinkedIn might be completely wrong for your email signature or business card.
Take the time to get the right versions for each platform. Organize your files so you can find them later. Update everything at once when you get new photos.
And if you’re in the Philadelphia area and realize your current headshots are outdated or you don’t have professional ones yet, that’s something I can help with. The important part is having high-quality headshots you feel comfortable using on every platform where your professional presence matters.
Ready to Get Started?
Have questions? Let's discuss your needs and create perfect professional images.